Is your Mac’s Wi-Fi not working? MacBook won’t connect to Wi-Fi? Here’s how to fix Wi-Fi issues on your Mac and what to do if you can’t join the Wi-Fi network.
Welcome to our Mac Wi-Fi troubleshooting guide, which offers fixes for situations where Wi-Fi isn’t working, your Mac refuses to connect to the internet, you MacBook won’t connect to Wi-Fi but other devices will, or your wireless signal strength is poor.
There are three main reasons why Wi-Fi stops working: there’s a problem with your router, your internet provider’s network is down, or there’s an issue with your own Wi-Fi network. Less commonly, there may be an issue with the macOS software you’re running. We cover all these scenarios in this article.
We have various steps to work through below, we’ve started with the ones that will hopefully fix your Wi-Fi problem quickly, but you might like to try a few of the latter tips if you have no luck.
In this article we cover the tips for fixing Mac Wi-Fi issues.
What to do when your Wi-Fi is not working
Work through the troubleshooting steps below to fix your Mac Wi-Fi problems.
1.
Turn it off and on again

Foundry
- Restart the app: If Safari, or any browser, stops working the first thing to do is quit and restart the browser.
- Restart the router: To establish whether the problem lies with your router turn it off and on again. To properly powercycle your router you need to disconnect it from power for about 30 seconds, then plug it in and turn it back on.
- Restart the Mac: It’s also a good idea to turn your Mac off and on again.
- Restart Wi-Fi: If there’s still an issue after you’ve rebooted your Mac, try turning the Wi-Fi off and then waiting a few seconds before turning it back on again to force it to scan for available networks again. To turn Wi-Fi off and on again click on the Wi-Fi logo in the menu at the top right of your Mac and switch the slide from blue to gray (or in older versions of the macOS select Turn Wi-Fi Off.)
You should also check that it’s not a problem with the website you are trying to access. Can you access Google? You could run a Ping test to see if there is a problem with the connection to a website you are accessing. Read about running Ping on a Mac here.
2.
Check Apple’s software

Apple
Unfortunately, sometimes the reason why you can’t connect to Wi-Fi is Apple’s operating system. In the past Mac users have encountered Wi-Fi problems after updating their Macs to a new version of macOS. Have you recently updated your Mac? Are other Mac users also experiencing issues with their Wi-Fi connection?
This was a big issue in 2015 with the original version of El Capitan (macOS 10.11). Following the update, many users found their Macs could no longer connect to their wireless network. Apple issued an update to the software, but this wasn’t an easy fix for MacBook Air owners who could only connect to the web via Wi-Fi due to the lack of an Ethernet port (unless they had an adapter). When we encountered this problem we had to update our Mac to a new version of macOS while sharing the internet connection from our iPhone.
If it’s a software update you need you could hotspot from your iPhone and connect to the internet that way. Just be careful about going over your data allowance! (Read our tips for sticking to your data allocation on your iPhone here.)
You may also experience problems with Wi-Fi if you are running a beta version of macOS. We had a lot of trouble with Wi-Fi dropping when we were running the High Sierra beta, for example.
3.
Check with your provider
Foundry
It is possible that the problem is more widespread, are other people in your area also experiencing issues? Is your landline phone down too? Try Downdetector to see if other people are having the same problem.
If the problem is at the provider’s end, there’s not much you can do about it beyond complaining–and you should absolutely do that. Hopefully they will be able to rectify the issue quickly.
Even if other parts of their network aren’t down, it might still be the provider’s problem or it could be a problem with your phone line. For example, if your broadband relies on cables then there could be a problem with the cabling to your house; if your web connection often cuts out during bad weather it may be because water is interfering with the cables.
4.
Disconnect Bluetooth
Foundry
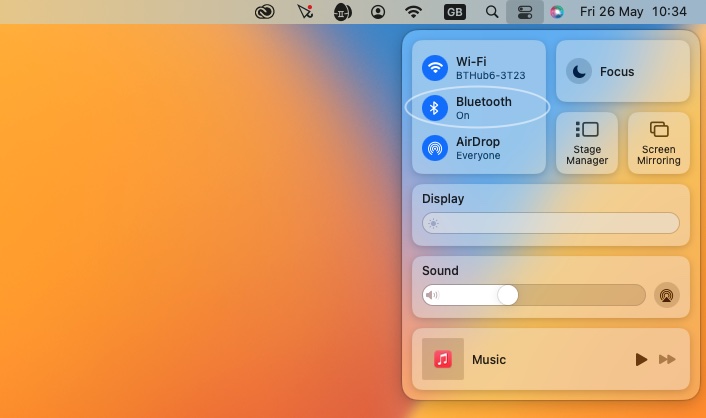
Still no luck? Try disconnecting Bluetooth. This is a fix that has worked for some people.
If you are running a recent version of macOS the Bluetooth options are in Control Centre, which is accessed by clicking on the switch icon in the menu at the top of the screen.
Click on the Bluetooth icon and you’ll see an option to turn it off.
If you have an older version of macOS, click the Bluetooth icon at the top right (the runic B next to the Wi-Fi icon) and select Turn Bluetooth Off.
5.
Forget the network
Foundry
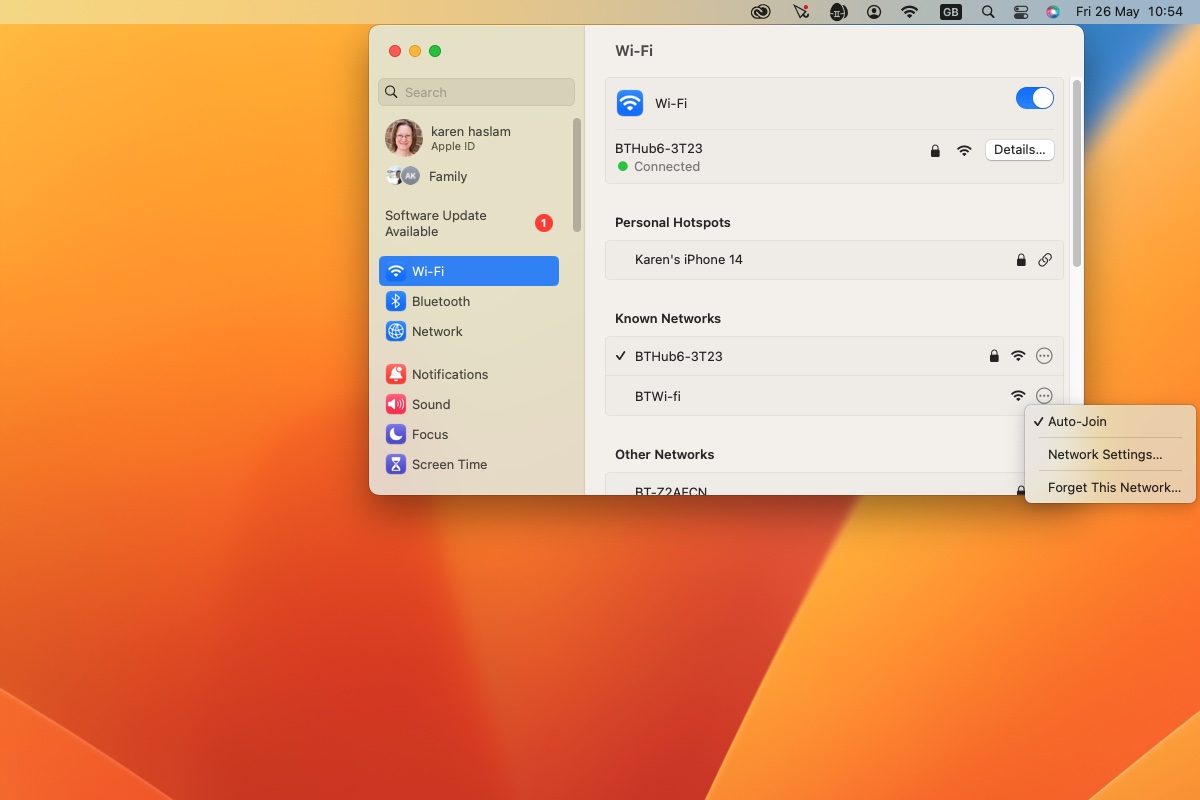
You may find that forcing your device to forget the network can help.
In macOS Ventura or later
- Go to System Settings.
- Click on Wi-Fi.
- Either click Details beside the network you are connected to, and then choose Forget This Network, or beside a network you want to forget click on the … and choose Forget This Network.
In macOS Monterey of earlier
- Go to System Preferences > Network.
- Select Wi-Fi and then click Advanced.
- Select the network you wish to forget, press the (-) and agree to Remove.
Once you’ve done this your Mac and other devices using your iCloud Keychain will not join that network.
Now try connecting to that network again, adding the password when requested.
6.
Keep your router cool and check it’s location
Thomas Newton / Foundry
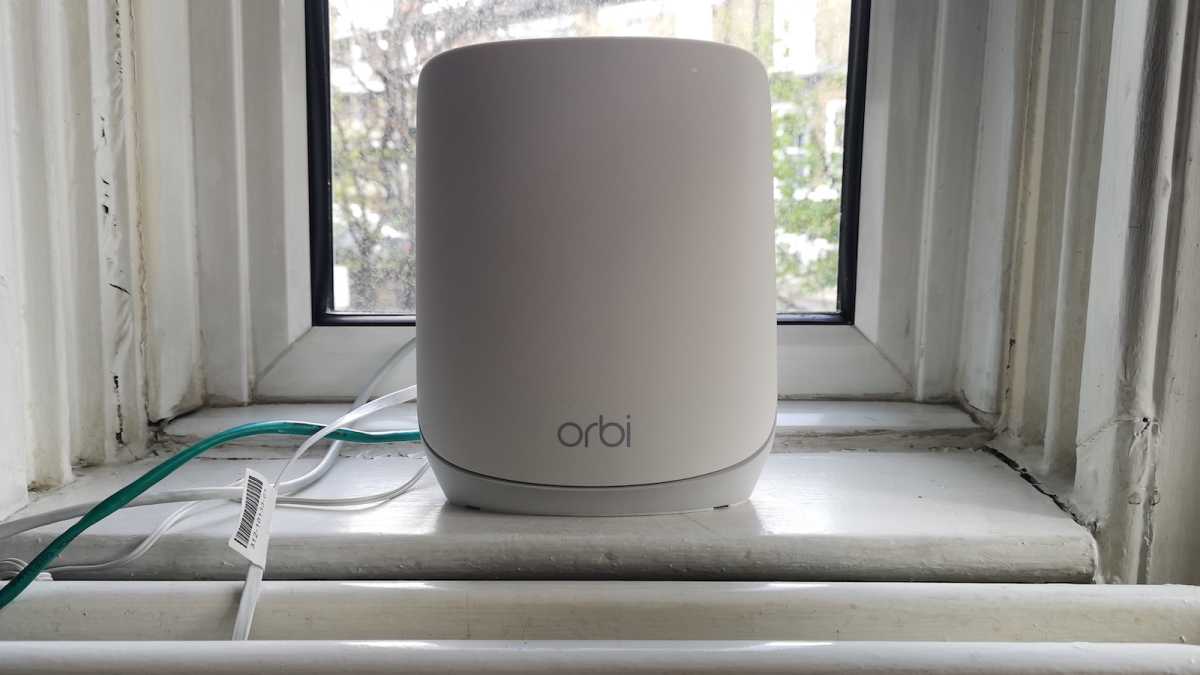
If things still don’t work, check your router isn’t overheating. Don’t cover it up or hide it away where there isn’t adequate ventilation, because if it gets too hot it won’t work as well.
Another thing to check is your router’s location. You will get a better signal if it’s not on or near any large metal surfaces – so don’t sit it on a filing cabinet, for example, and don’t put it right next to a radiator.
Move your laptop closer to your router and see if you get a signal from there. If it turns out the signal is fine when you’re right next to the router, it’s likely that something in your house or office is causing interference.
If it is time to upgrade your router check out our favorite routers in our round up of the Best routers for Mac.
7.
Find out if something is blocking the signal from your router

There are lots of reasons why the signal strength can be weaker in certain locations and not others. For example, thick walls in old houses can make getting a signal in one corner of the house impossible.
If there is a lot of metal in the building that can also cause issues with your Wi-Fi, so it might be worth checking what materials were used in the construction of your property.
You can use an app called NetSpot (free edition, or there’s a $49 Home version) to analyze the Wi-Fi signal in your building. Move your Mac around and chart the signal strength in various locations to get an idea of where the signal is stronger and where’s it’s weak.
Alternatively the problem may be other electrical devices, such as fans, motors, microwaves and wireless phones. Does your Wi-Fi drop at the same time as you use the microwave? Because they’re both using radio waves you can get interference when you turn your microwave on.
Try to position your router far away from these devices and don’t use the microwave at the same time as an important conference call.
8.
Use Apple’s Wireless Diagnostics
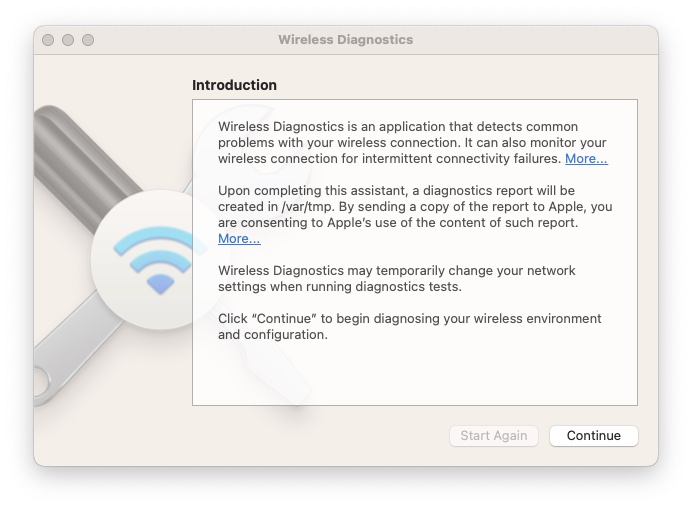
Apple has a free tool in macOS that can help you identify the issue. The Wireless Diagnostics app can analyse your network and indicate what is wrong and how you might be able to fix it.
There are two simple ways to access Wireless Diagnostics on a Mac. Either press and hold Alt/Option and click on the Wi-Fi icon in the menu and click on Open Wireless Diagnostics, or search for it by name using Spotlight (Cmd + spacebar).
- Open Wireless Diagnostics.
- Click Continue and wait while your Mac runs diagnostics.
- Even if the Mac doesn’t find anything wrong click on Monitor my Wi-Fi connection to get it to assess your wireless connection for connectivity failures.
- Run this for a while and then click Continue when you want to stop monitoring. You can add more information about the router in the next screens.
- Click on Continue again and the tool will start to create a diagnostics report (this can take a few minutes).
- This diagnostics report might include useful information to share with your service provider.
- Once the report is generated locate it in the /var/tmp folder. To reach this open Finder and click on Go and paste in /var/tmp.
- You can forward the report to anyone who might need it.
Unfortunately the information offered here probably won’t mean much to the average Mac user. However there are more useful tools to be found in Wireless Diagnostics, such as the one discussed below.
9.
Use Wireless Diagnostics to look for drop offs
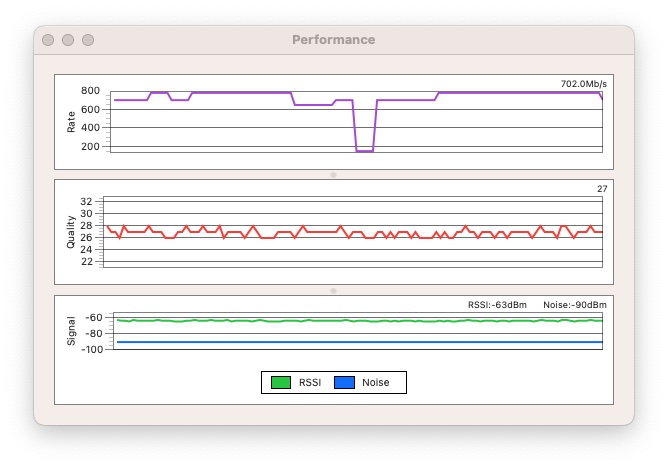
You can also get an idea of whether other devices are causing your signal to drop by using the Wireless Diagnostics utility.
To generate a graph like the one shown above, follow these steps:
- Open Wireless Diagnostics. Either search for it by name using Spotlight (Cmd + spacebar), or hold Option/Alt and click on the Wi-Fi icon at the top right of the screen, then select Open Wireless Diagnostics.
- Before you click Continue to run a report, go to the menu and click on Window > Performance (or hit Alt + Cmd + 5).
This will generate three graphs that will tell you about the transmission rate, signal quality, and signal and noise levels. If you monitor this for a few hours you may be able to identify whether there is a problem.
The top graph displays the data rate of your wireless network in Mbps. The level of the graph will be dictated by your router and other equipment you have connected to it. The important thing, in troubleshooting terms, is that the rate is reasonably consistent. If you are seeing dips in the data rate, or a complete drop-off, it indicates that there is a problem.
The middle graph, labelled Quality, displays the ratio of signal to noise over time. Ideally, it should be a straightish line with small spikes. If you notice frequent dips in the line, it’s likely that something is interfering with your Wi-Fi signal.
The bottom graph, labelled Signal, displays both the signal strength and measured noise. Both are shown as dBM, or Decibel-milliwatts, a commonly used unit of the absolute power of radio signals. A reliable signal should have a signal strength of somewhere between -60 and -10dBm and a noise level below -75dBm. The narrower the gap between the two lines on the graph, the more unreliable the signal is likely to be.
If you notice sudden increases in noise, try to identify when and why they occur. Does it happen, for example, when a wireless phone handset is in use, or when a microwave is switched on? If you identify that a particular appliance is interfering with the signal, move the router away from the appliance that’s causing the problem.
You could also try varying the height of the router as well as its horizontal position to see if that has any effect on the reception when the interfering gadget is in use.
10.
Extend your Wi-Fi reach
Linksys
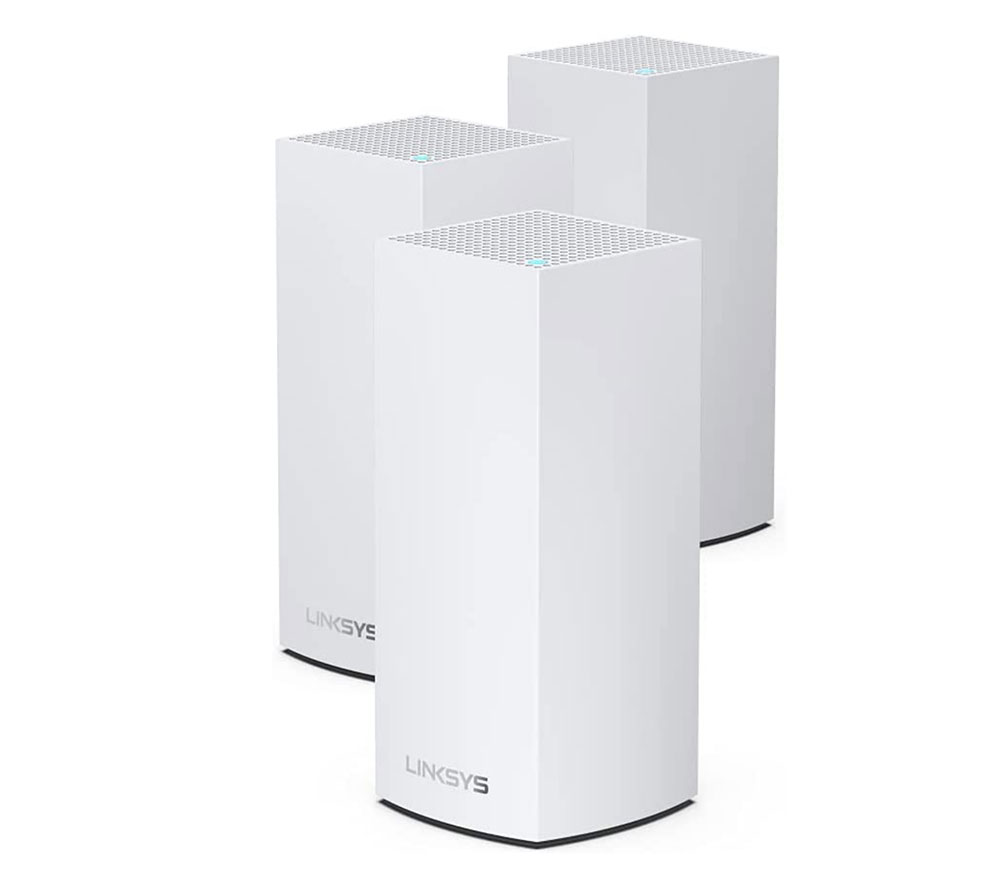
If you have identified the problem as being an issue with the signal strength in certain parts of your building we recommend getting a Wi-Fi extender or investing in a mesh network. We have a round up of Mesh routers where we recommend the Linksys Velop AX4200 which you can buy from Apple U.S. for $249.95 or Apple U.K. for £259.95. A cheaper option is the D-Link E15 Eagle Pro range extender, which is available for $64.99 (currently $54.99) at Amazon U.S. and at at Amazon U.K for £70 (currently £32.99).
When you set up the Wi-Fi extender make sure you change the SSID (Wi-Fi name) and password of the new device so it’s the same as your current wireless router and modem, to enable your Mac to pick whichever device is offering the better connection without you having to switch and enter a new password.
11.
Check the competition
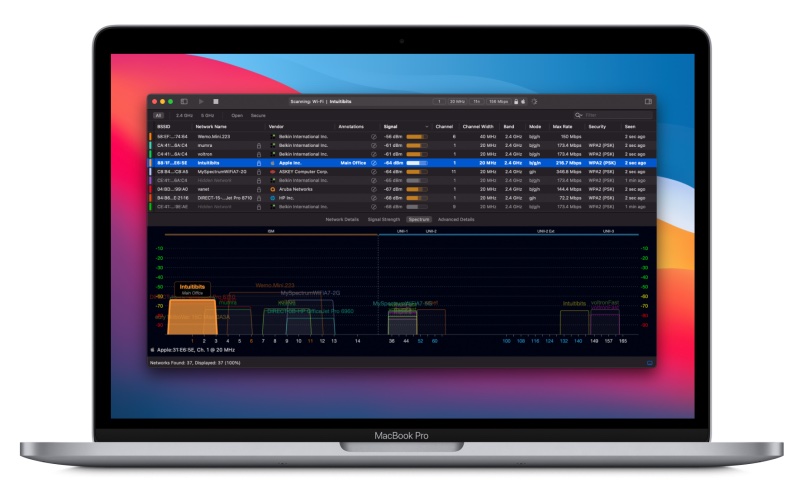
Your Wi-Fi connection may also be suffering because of other networks nearby, sharing the radio waves with you–particularly if you’re in a built-up area.
You can see what the other Wi-Fi networks near you are by clicking on the Wi-Fi icon in the menu and choosing Other Networks. This will tell you if there are a lot of WiFi networks near you.
To find out what channels all those competing routers are using open Apple’s Wireless Diagnostics app again and click on Window in the menu. Next click on Scan.
This shows you information about the kind of router people near you are using and it also shows the RSSI – which is the Received Signal Strength Indicator. The RSSI for your own router should be better than the competition.
To find out more about the other traffic is in your area your could try the WiFi Explorer app ($19.99/£19.99).
WiFi Explorer will help you see what other networks are in your area. It provides a lot more information than you normally see in the list of available networks on your Mac, such as the network name (SSID), BSSID, vendor, country code, channel, band, security configuration, supported data rates, number of streams, and more.
12.
Choose a unique network name
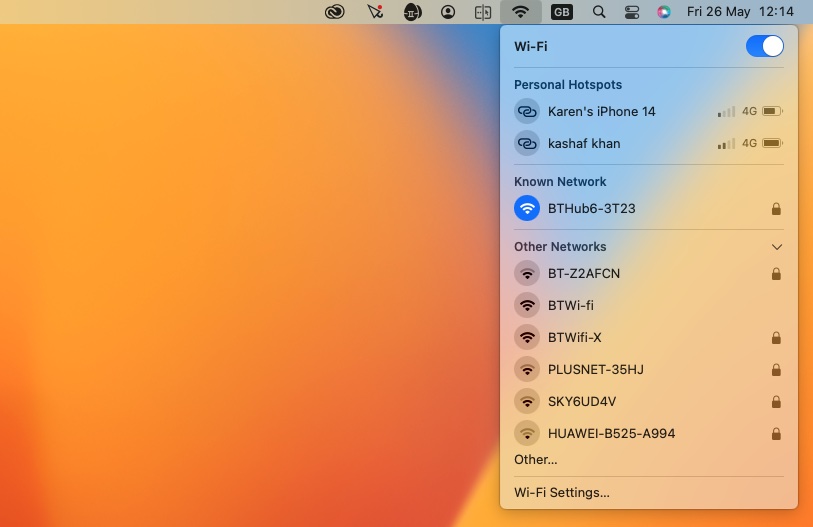
Now you have seen these different Wi-Fi networks, make sure you configure your Wi-Fi network with a unique name so that it doesn’t conflict with the names of other nearby networks.
You also shouldn’t hide your network, this may sound like it would protect your network from someone who might try to hack in to it, or a neighbor who might be able to guess your password, but your devices may take longer to find a hidden network and hackers will have other ways to find it anyway.
13.
Switch bands and change your Wi-Fi channel
Routers do a good job of selecting channels automatically, based on what else is operating nearby. If, however, you notice that your router is operating on the same channel as another router nearby, or you think you might benefit from switching to something better suited to your surroundings you might want to consider changing it manually.
You could go some way to counter competition from other Wi-Fi networks by changing the band you are using and channel you’re on.
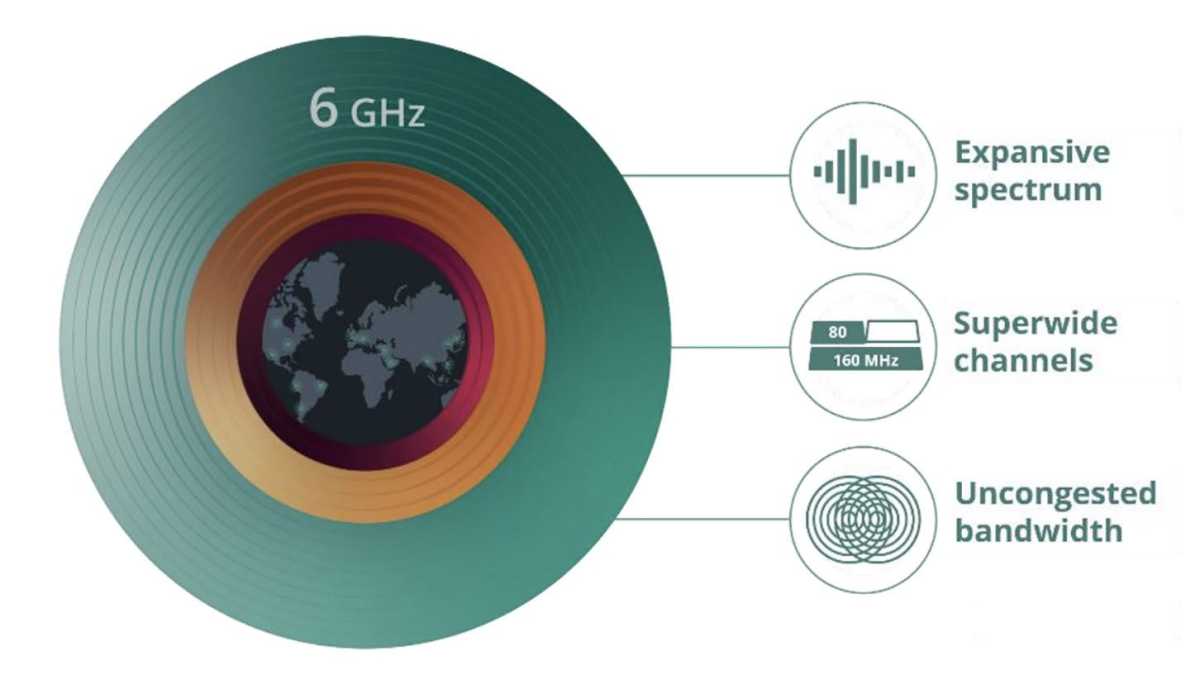
There are three bands of Wi-Fi available and your router will either use the 2.4GHz band, the 5GHz band, the 6GHz band, or all of them. The 5GHz and 6GHz bands offer more bandwidth than the 2.4GHz band and is less susceptible to interference because other domestic appliances don’t use that frequency, however, because the 2.4GHz band uses a lower frequency it can get through thick walls and other objects.
If you have a new 6GHz router it uses the 1200MHz wide Wi-Fi spectrum, which is much larger than the 2.4GHz and 5GHz spectrums. It also adds seven 160 MHz channels to the mix. You can only take advantage of these with a Wi-Fi 6E router. See: What Wi-Fi 6E means for Apple’s new Macs and the iPhone 15.
If your problem could be solved by using the 5GHz or 6GHz bands – and they are available to you – follow these steps:
How to switch to the 5GHz or 6GHz band
To use the 5GHz or 6GHz band on your dual-band router you’ll need to separate the 2.4GHz and 5GHz/6GHz networks on your router (check its manual to find out how) and give them different names.
Click the Wireless Options button at the bottom of the window and click the box next to ‘5GHz network name’. Now give it a different name.
Once you’ve separated the 2.4GHz and 5GHz/6GHz networks, you need to tell your Mac and iOS devices to join 5GHz/6GHz in preference to 2.4GHz.
- In macOS Ventura or later open System Settings and click on Wi-Fi. Select the 5GHz/6GHz network and connect to it. Right click on the 5GHz/6GHz network and make sure Auto-Join is on. Deselect Auto-Join on the 2.4GHz network.
- In macOS Monterey or earlier go to the Network pane in System Preferences and click on Wi-Fi. Choose the Advanced button and drag the 5GHz/6GHz network to the top of the list.
- On an iOS device, tap on Settings, then Wi-Fi. Tap on the ‘i’ next to the 2.4GHz network, and slide ‘Auto-Join’ to off.
We have a tutorial about How to switch to 5GHz on a Mac here.
How to change the channel in the 2.4GHz band
If your router is too old to offer 5GHz or 6GHz, or the 2.4GHz band is better suited to the thick walled building you live in, you could try changing the channel.
There are 13 channels on the 2.4GHz bands of which all but 1, 6 and 11 overlap. You’d be wise to pick a channel as far away from the one your neighbours use if possible.
The steps you need to follow to change the channel on your router will depend on your router software. To access your router software you need to know the IP address of your router. Most routers have an IP address of http://192.168.0.1 or http://192.168.1.1.
Open your web browser and type the IP address into the address bar and press enter. This will bring up your router software. Look for the channel information and log into your router to change it.
Don’t just move it to the next available channel, however. Channel frequencies overlap, meaning that narrowband routers use five channels concurrently and wideband routers use seven. So, if you manually change channels, make sure you move at least five or seven channels away from the one your router is currently operating on.
As you make changes, keep monitoring the graphs in Wireless Diagnostics so you can see which ones make a significant difference to signal quality.
Alternately you could configure your Wi-Fi network channel to Automatic so that it selects the best channel to use.
14.
Run Apple Diagnostics
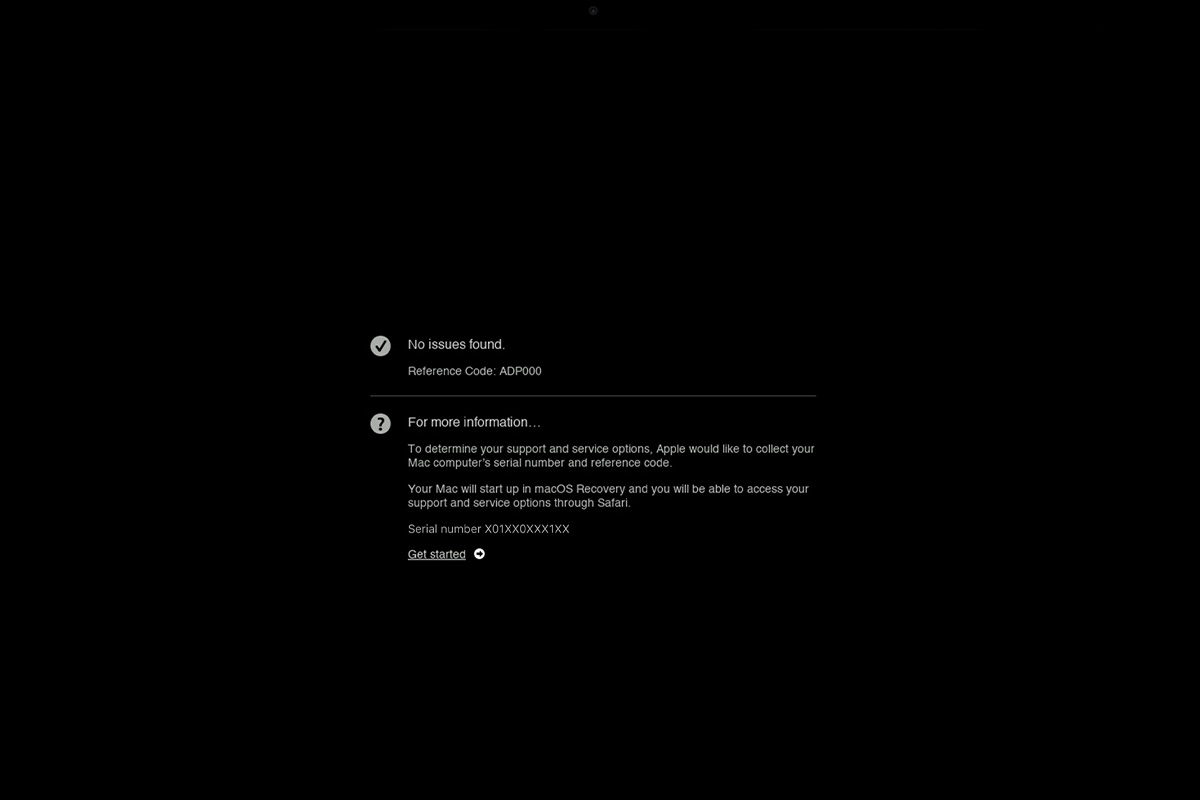
If you still haven’t solved your Wi-Fi worries you could use Apple Diagnostics to check for Wi-Fi or network issues.
To do so follow these steps:
- Disconnect all external devices (except the keyboard and screen).
- Shut down the Mac, then turn it on while pressing and holding D.
- When you see the screen asking you to choose your language do so, then watch as the progress bar indicates that your Mac is being assessed. This takes 2-3 minutes.
- If problems are identified, Apple Diagnostics will suggest solutions.
15.
Reset your SMC, PRAM or NVRAM

IDG
Reset the PRAM and the SMC (System Management Controller) is worth a try. This process is covered here: How to reset your Mac’s NVRAM, PRAM, and SMC.
16.
Change the DNS setting for your network

Changing your DNS settings is also recommended, but like resetting SMC, PRAM and NVRAM it’s not for beginners.
You need to start by deleting your Wi-Fi preference files, but we advise you to back them up first!
- Find the Wi-Fi preferences by opening the Finder and choosing Go > Go To Folder and typing: /Library/Preferences/SystemConfiguration/
- In this window locate the following files and drag them to clearly labelled backup folder on your Desktop:
com.apple.airport.preferences.plist
com.apple.network.identification.plist
com.apple.wifi.message-tracer.plist
NetworkInterfaces.plist
preferences.plist - Reboot the Mac.
- Turn on Wi-Fi and see if it works.
- If Wi-Fi doesn’t work you need to create a new Wi-Fi network location, adding custom MTU and DNS details.
- Before you do this, quit any apps that might be using Wi-Fi or the network.
- Go to System Preferences > Network and choose Wi-Fi. Click on the menu beside Location and choose Edit Locations, click the + to create a new location and name it something memorable. Click Done.
- Join the Wi-Fi network, using your usual router password.
- Click on Advanced and under the TCP/IP tab choose Renew DHCP Lease. Go to the DNS tab and add 8.8.8.8 and 8.8.4.4 to the DNS Servers list. (Those are the Google DNS, which are generally the fastest options, but you can add something else if you prefer.)
- Choose Hardware and Configure Manually.
- Change MTU to Custom and set it to 1453, click OK and Apply.
If you decide that the problem is with your router and cannot fix it, perhaps it’s time to buy a new router.


